今回はUbuntuにLiteSpeedを入れて、Laravel9でWEBシステム構築のメモ。
仕事メモです。
LiteSpeedの指定があったワケじゃないんだけど、WEBのコンソールが使える用でしたので便利なのかな?と思って構築してみただけ。
テスト用で後ほど同サーバーにWordPressも入れてみようと思いますが、とりあえずLaravel9。
Ubuntu20.04 に LiteSpeed Web Server をインストール
まず Open LiteSpeed のインストールから。
こうれいのコマンドから。
# apt-get update
# apt-get upgrade
# apt-get dist-upgrade
# reboot
リポジトリ追加
# wget -O - http://rpms.litespeedtech.com/debian/enable_lst_debian_repo.sh | sudo bash
OpenliteSpeedをインストール
# apt install openlitespeed
phpのパッケージをインストール。
# apt-get install lsphp80 lsphp80-mysql lsphp80-common
最初に設定した際に、lsphp80-mysqlが無かったばかりに、
「could not find driver」のエラーにさいなまれました・・・。
openlightspeedのphpの設定を有効にするらしい。
# ln -sf /usr/local/lsws/lsphp80/bin/lsphp /usr/local/lsws/fcgi-bin/lsphp5
OpenliteSpeedを実行
startさせます。
# /usr/local/lsws/bin/lswsctrl start
パスワードの設定。
# /usr/local/lsws/admin/misc/admpass.sh
WEBコンソールから設定
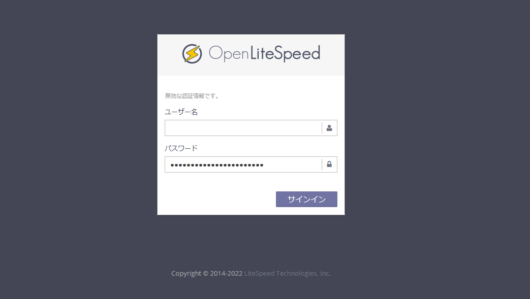
http://サーバーIP:7080 などでアクセス。
設定したIDとパスワードでログインします。
ちなみに ポート:7080 はファイヤーウォールで制限しておきました。
ログインしたら画面右上で日本語化可能です。
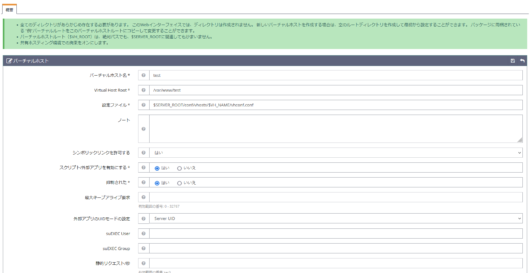
バーチャルホストリストの設定
設定ファイルは保存する際にエラーが表示されますが、そこにあるリンクをクリックすれば設置される。
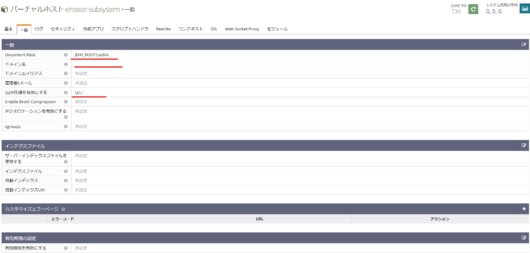
あとはバーチャルホストの設定をする。
Document Root はLaravelの場合 $VH_ROOT/public になる。
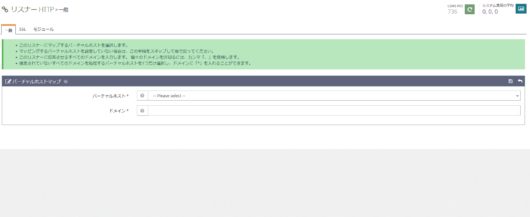
リスナーの設定
80番ポートにバーチャルホストとドメインを設定。
サーバーの設定
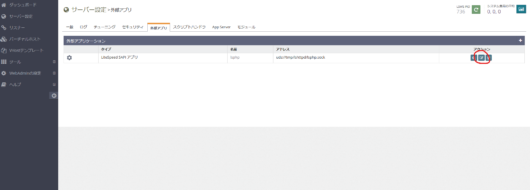
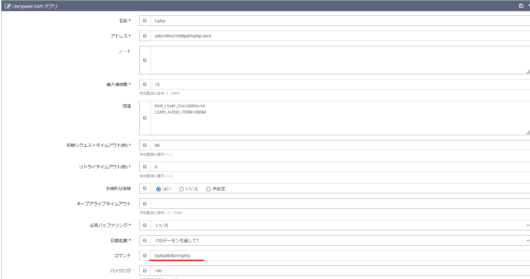
PHP8を使えるように設定。
そして再起動する。
SQLとPHP8をインストール
mariadbと、
Laravelのartisanを使う為にPHP8をインスト。
まずMySQL ってか mariadb
# apt install -y mariadb-server
Sqlの設定
# /etc/init.d/mysql start
# mysql -uroot -p

//rootのパスワード設定
MariaDB [(none)]> update mysql.user set password=password('rootのパスワード') where user = 'root';

//laravelで使うDBの設定
MariaDB [(none)]> CREATE USER 'username'@'localhost' IDENTIFIED BY 'password';
MariaDB [(none)]> CREATE DATABASE IF NOT EXISTS laravel CHARACTER SET utf8mb4 COLLATE utf8mb4_general_ci;
MariaDB [(none)]> GRANT ALL PRIVILEGES ON laravel.* TO 'username'@'localhost';
MariaDB [(none)]> FLUSH PRIVILEGES;
MariaDB [(none)]> quit;
PHP8をインストール
LiteSpeedのPHPと別に、laravel9ではPHP8が必要。
# add-apt-repository ppa:ondrej/php
# apt install -y php8.0 php8.0-intl php8.0-mysql php8.0-gd php8.0-dom php8.0-curl php8.0-mbstring php8.0-xml php8.0-zip
とりあえず、Apacheの時と同じぶんインストしておいた。
Laravelをインストール
ようやくLaravelのインストに。
まずComposer
# apt install -y curl php-cli php-mbstring git unzip
# php -r "copy ( 'https://getcomposer.org/installer', 'composer-setup.php' ) ;";
# php composer-setup.php --install-dir=/usr/local/bin --filename=composer;
# composer -v


  / ____/___  ____ ___  ____  ____  ________  _____
 / /   / __ \/ __ `__ \/ __ \/ __ \/ ___/ _ \/ ___/
/ /___/ /_/ / / / / / / /_/ / /_/ (__  )  __/ /
\____/\____/_/ /_/ /_/ .___/\____/____/\___/_/
                    /_/
Composer version 2.1.9 2021-10-05 09:47:38
Git
私の場合、ローカルで開発したモノをGITでPULLするので、その作業。
# mkdir /var/www
# cd /var/www
# git clone https://github.com/ユーザ名/プロジェクト.git
Laravel の設定関係
クローンしたプロジェクトを動くようにする。
//まずはcomposer instal
# composer instal

//.envの設置
# cp -p .env.example .env
# vim .env

//.env に APP_KEY を設定
# php artisan key:generate

# php artisan migrate
あとは必要があればシーディング。
GitをLiteSpeedのユーザーで実行できるようにする
pullした時にrootにならないようにGitの設定
# mkdir /var/www/laravel .ssh -p
# vim /var/www/laravel/.ssh/config

Host github.com
    User #GITアカウントT#
    Port 22
    HostName github.com
    IdentityFile ~/.ssh/#GITHUB_SECRET#.secret
    TCPKeepAlive yes
    IdentitiesOnly yes


#chown nobody:nogroup -R /var/www/laravel
そんでPULLしてみる。
# sudo -u nobody git pull
これでアクセスしてページが表示されてればOK。
SSL の設定
今時HTTPSなんで設定します。
letsencrypt
# apt install certbot

//設定に合わせて、-w,-d,-m を設定。
# certbot certonly  --agree-tos --webroot -w /var/www/laravel/public -d hoge.com -m hoge@hoge.com

IMPORTANT NOTES:
 - Congratulations! Your certificate and chain have been saved at:
   /etc/letsencrypt/live/hoge.com/fullchain.pem
   Your key file has been saved at:
   /etc/letsencrypt/live/hoge.com/privkey.pem
   Your cert will expire on 2022-08-10. To obtain a new or tweaked
   version of this certificate in the future, simply run certbot
   again. To non-interactively renew *all* of your certificates, run
   "certbot renew"
 - If you like Certbot, please consider supporting our work by:
上手くいけばのようになるので、
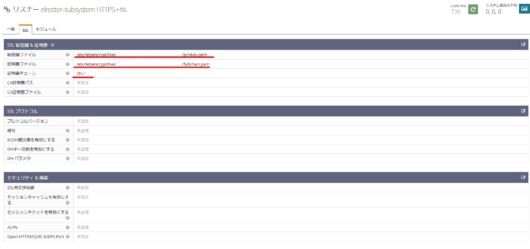
/etc/letsencrypt/live/hoge.com/fullchain.pem
/etc/letsencrypt/live/hoge.com/privkey.pem
↑をメモ。
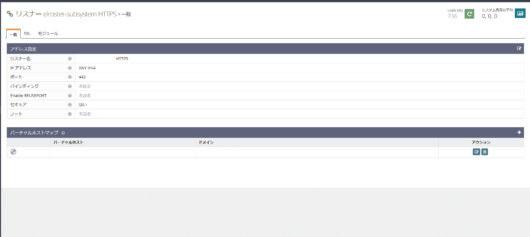
リスナーの設定
https用のリスナーを作って、先ほどのカギをセットして完了です。
その他の設定
タイムゾーン
タイムゾーンの設定やらないと mariadb の時間ズレてしまいました。
defaultはOSの設定を使うようなのでタイムゾーンの設定やります。
# timedatectl set-timezone Asia/Tokyo

# timedatectl

               Local time: Mon 2021-10-20 19:48:26 JST
           Universal time: Mon 2021-10-20 10:48:26 UTC
                 RTC time: Mon 2021-10-20 10:48:27
                Time zone: Asia/Tokyo (JST, +0900)
System clock synchronized: yes
              NTP service: active
          RTC in local TZ: no


//SQLが立ち上がってたら再起動
systemctl restart mysql
デフォルトのPHPの設定
アプデの際に、PHPが8.1になってエラーしたんで、php8をデフォルトに設定。
# sudo update-alternatives --config php
There are 3 choices for the alternative php (providing /usr/bin/php).

  Selection    Path                  Priority   Status
------------------------------------------------------------
* 0            /usr/bin/php.default   100       auto mode
  1            /usr/bin/php.default   100       manual mode
  2            /usr/bin/php8.0        80        manual mode
  3            /usr/bin/php8.1        81        manual mode

Press <enter> to keep the current choice[*], or type selection number: 2
update-alternatives: using /usr/bin/php8.0 to provide /usr/bin/php (php) in manual mode

# php -v
PHP 8.0.14 (cli) (built: Dec 20 2021 21:22:57) ( NTS )
大体こんな感じだったと思います。
思ったよりも面倒でした・・・。

